The allure of a beautifully curated living space often feels unattainable, especially when browsing high-end interior design magazines. Yet, the vision of a personalized home, replete with bespoke accents, is well within reach for the discerning enthusiast. As explored in the insightful video above, transforming your environment does not necessitate an exorbitant budget or advanced artisan skills. Rather, it thrives on creativity, resourcefulness, and a willingness to engage with accessible DIY home decor projects.
My own journey into home decor began with a simple desire for warmth and character. I often found inspiration in boutique shops, only to be deterred by the prohibitive pricing. This led me to embrace the philosophy that true elegance stems from unique touches, not just price tags. Crafting distinct items for my abode has become a rewarding endeavor, echoing the sentiments shared in the accompanying video. These projects, ranging from rustic centerpieces to vibrant textile updates, prove that sophisticated design is profoundly achievable through thoughtful, handmade efforts.
Elevating Your Aesthetic: The DIY Rope Centerpiece
A home’s focal point often resides in its centerpieces, anchoring the visual narrative of a room. The DIY rope centerpiece, a project highlighted in the video, exemplifies how raw materials can coalesce into a refined object. This endeavor transcends mere crafting; it’s an exercise in textural artistry. Starting with a basic plate, readily available for approximately $4 for a set of three at stores like Michael’s, provides an ideal foundation. This cost-effective base allows for the creation of multiple pieces or experimentation with various finishes. The choice of natural fiber rope, typically retailing around $6 per roll, introduces an organic element. This material is paramount for achieving a tactile, inviting finish.
The application process, involving a hot glue gun, requires a methodical approach. Small, precise dots of adhesive are crucial to prevent bleed-through and ensure a clean bond. Subsequently, wrapping the rope tightly and evenly around the plate demands patience and precision. Each rotation contributes to the ultimate structural integrity and visual appeal. This seemingly simple action cultivates a sense of meditative focus, transforming a mundane object into a sculptural form. The resultant centerpiece possesses a timeless quality, suitable for various interior design schemes, from coastal chic to modern minimalist. Its handmade origin infuses it with an authentic charm. Ultimately, such DIY home decor initiatives grant control over aesthetic and expenditure.
Designing with Texture and Form: Rope Selection and Application
The selection of rope is not merely an aesthetic decision; it’s a structural one. Sisal, jute, or cotton ropes each present unique textures and handling characteristics. Sisal offers a rougher, more rustic appeal, while cotton provides a softer, more pliable finish. Jute, often favored for its natural hue and durability, strikes a balance. The rope’s diameter also impacts the final look. A thicker rope creates a bolder statement, whereas a thinner one allows for more intricate detail. Prior to application, a preliminary dry wrap can help gauge material requirements and design flow.
Adhesive choice extends beyond traditional hot glue. For enhanced durability, a strong fabric adhesive or E6000 glue offers a more permanent bond. These alternatives mitigate the risk of unraveling over time, particularly in high-traffic areas or humid environments. Applying a thin, even bead of adhesive just ahead of the wrapping motion ensures maximum adhesion without excess. Moreover, finishing the rope ends with a small dab of clear sealant prevents fraying and maintains a polished look. This attention to detail elevates the piece, distinguishing it from mass-produced decor. This type of thoughtful execution is central to successful DIY home decor.
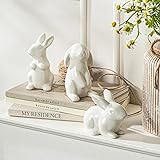
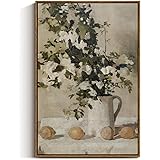
Transformative Finishes: The DIY Metallic Vases
Vases are more than mere receptacles for flora; they are sculptural elements that introduce verticality and visual interest. The DIY metallic vases featured in the video demonstrate a powerful technique for repurposing common items into striking design pieces. Sourcing pre-owned or inexpensive vases from retailers like HomeGoods, with prices ranging from $7 to $15, provides an economical starting point. The transformative power truly resides in the application of metallic spray paint, a product typically priced between $10 and $12. This simple material can emulate the sophisticated sheen of high-end metals.
The technique involves meticulous preparation. Taping off specific sections of the vase creates distinct, two-toned designs, offering a modern, segmented aesthetic. This method allows for a “half and half” effect, contrasting the metallic finish with the original vase material or another painted section. Conversely, a full metallic coat delivers a monolithic, bold statement. Successful application hinges on maintaining an appropriate spray distance; standing too close inevitably results in drips and uneven drying. Proper ventilation is also paramount for safety and optimal curing. These DIY home decor endeavors infuse personal style into ordinary objects.
Achieving Professional Results: Spray Painting Techniques and Safety
Optimal spray painting demands a controlled environment. Execute painting outdoors or in a well-ventilated area to dissipate fumes effectively. Employing drop cloths or newspaper protects surrounding surfaces from overspray. Before commencing, clean vases thoroughly with rubbing alcohol to remove any oils or dust, which could impede paint adhesion. Primer application, though not strictly necessary for all surfaces, enhances paint longevity and provides a more uniform base. A light sanding with fine-grit sandpaper can further improve adhesion on slick surfaces.
Apply metallic spray paint in several light, even coats rather than a single heavy application. This strategy minimizes drips and ensures a smooth, consistent finish. Allow adequate drying time between coats, typically 15-30 minutes, as per product instructions. For crisp lines when taping, remove the tape promptly after the final coat, while the paint is still slightly tacky but not wet. This prevents the paint from peeling along with the tape. Curing time, often several hours or even days, allows the paint to harden fully, achieving maximum durability. Adherence to these protocols yields results comparable to professional finishes, embodying true DIY home decor expertise.
Functional Aesthetics: The DIY Front Door Mat
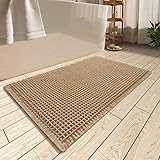
The entryway serves as a critical transition zone, offering the first impression of a home’s interior. A well-designed doormat merges practical utility with aesthetic appeal. The DIY front door mat, as detailed in the video, ingeniously combines a basic mat with natural elements. A simple mat, costing around $5 at retailers like Walmart, forms the foundation. The innovation lies in integrating river rocks, which offer superior functionality for dirt and debris removal. These rocks, priced around $6 per bag, can often be acquired at a discount during sales, particularly at craft stores such as Michael’s.
The placement of river rocks on the mat transforms a conventional item into a highly effective cleaning station. As shoes scuff against the textured surface of the rocks, dirt and grime dislodge more efficiently than with traditional fiber mats. This design not only keeps interior floors cleaner but also introduces an organic, spa-like aesthetic to the entryway. While the rocks are generally too large to pose a significant choking hazard for toddlers, vigilance is advisable. Regular cleaning of the rocks, perhaps a quick rinse and air dry, maintains their efficacy and appearance. This project exemplifies how DIY home decor can be both beautiful and highly practical.
Beyond the Threshold: Rock Selection and Mat Durability
The choice of rocks for this DIY project significantly influences its effectiveness and longevity. River rocks, characterized by their smooth, rounded surfaces, are ideal as they are gentle on shoe soles yet abrasive enough to dislodge debris. Avoid sharp or jagged stones, which could damage footwear or pose a safety risk. Varying rock sizes within a single mat can enhance both the cleaning action and visual texture. For optimal drainage and stability, select a mat with a robust, open-weave construction or a rubberized backing. This prevents the rocks from shifting excessively and allows moisture to pass through.
To secure the rocks and ensure long-term durability, consider adhering them to the mat with a strong, outdoor-grade adhesive. Silicone sealant or construction adhesive offers excellent weather resistance and bonding strength. Arrange the rocks strategically to cover the entire surface of the mat, creating a dense, interlocking pattern. This maximizes the cleaning area and prevents gaps where dirt might accumulate. For families with very young children, opting for larger, heavier rocks can further mitigate any potential for displacement. This thoughtful approach ensures the DIY home decor piece remains both functional and safe for years.
Textile Transformation: The DIY No-Sew Pillow Cover
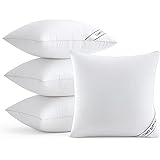
Pillows are often considered the jewelry of furniture, capable of injecting color, texture, and personality into any space. The DIY no-sew pillow cover project, a boon for those averse to needle and thread, offers an incredibly versatile method for revitalizing tired cushions. As demonstrated in the video, beginning with a wrinkled pillow or fabric requires a preparatory step; steaming or ironing smooths out creases, ensuring a polished final product. The core appeal of this method lies in its ability to transform an otherwise unremarkable pillow into a vibrant accent, showcasing personal style without extensive effort.
Fabric selection is paramount for this project. Sourcing materials from retailers like JoAnn Fabrics, particularly during sales, can yield significant savings; a quality fabric, such as the seafoam material mentioned, might cost around $13 but potentially cover multiple projects. The technique itself mimics gift wrapping, involving a series of folds and ties. By folding the fabric over the pillow and then securing the ends with decorative knots, a snug, tailored fit is achieved. This method allows for easy fabric changes, enabling seasonal updates or aesthetic shifts without investing in entirely new pillows. This is a highly adaptable and budget-friendly DIY home decor solution.
Mastering the Fold: Fabric Choice and Finishing Touches
The success of a no-sew pillow cover hinges on appropriate fabric choice. Opt for fabrics with a good drape and minimal fraying, such as cotton blends, linen, or even soft upholstery fabrics. Avoid overly stiff or slippery materials, which can be challenging to manipulate and tie securely. When purchasing fabric, consider its width in relation to your pillow size; a fabric twice the width of your pillow, plus enough for the ties, is a good starting point. Seasonal patterns or rich textures can dramatically alter a room’s ambiance, providing an immediate visual refresh. This creative use of textiles is fundamental to effective DIY home decor.
The “gift wrapping” analogy for folding is apt. Ensure the fabric is centered on the pillow, then bring the two longest sides together and overlap them. This creates a secure “envelope” around the pillow. Subsequently, fold the shorter ends inward towards the center, creating flaps. These flaps are then gathered and tied into decorative knots. Experiment with different knot styles—a simple square knot, a bow, or a fisherman’s knot—to find what best suits your aesthetic. For an exceptionally neat finish, a small amount of fabric glue can secure any loose edges or tucks, ensuring the cover remains pristine despite regular use. This adaptable method allows for endless creative variations in your DIY home decor.